- Home
- How to Build Raised Beds
How to Build Raised Beds
Raised Bed Construction:
Guidelines for Durability and Success
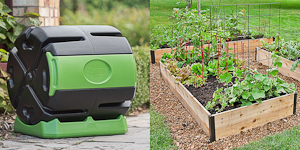
 Flowers Alongside Veggies in a Community Garden Raised Bed
How to Build Raised Beds goes hand in hand with the Raised Bed Photo Gallery, where you can explore nine different raised bed garden designs with their construction details.
This page gives you very important info that applies to all raised bed garden designs. (And it may contradict some of what I've seen out there that "just ain't so"...)
How to Build Raised Beds: Guideline #1
Build all raised beds with very strong corners.
The single most important thing about how to build
raised beds is making sure the corners don't blow out under the pressure of all that potting mix, water and plant material.
Whichever frame you build, make sure it is "overbuilt" of strong timbers that are very well connected at both the corners and along the sides.
Do
not just screw one board into the other at the corners. Screws do not
hold well in the end grain of wood, especially under pressure, over
time. It's better to put a 4x4 or 2x4 in the inside corner, and
then screw both boards into it instead. That way the screws are biting
into side grain where the wood fibers will be able to grip the screws. I
recommend using hex head lag screws with washers rather than
construction screws.
Another raised bed construction technique is to build with 4x4 or 4x6 timbers, using long lag screws (or 12" spikes) to anchor them together in tiers, 3 to 6 tiers high. Lag-screw the second tier onto the first, then the third onto the second, etc. Stagger the screws so they don't run into each other, and countersink them so that they don't stick up above the surface, so that the timber above can lay flat on the timber below.
Make sure your timbers are straight and true, with no bow or twist in them. If you have a long side, 6 feet or more, you might want to also run a rebar rod vertically through the tiers. To do this drill a 1/2" diameter hole all the way through the tiers (you'll need a long auger bit for this), and pound a 3/8" diameter rebar rod through them to hold them all together. The rebar should be at least the same length as the height of the bed, or longer if you want to drive it right into the ground to anchor it.
How to Build Raised Beds: Guideline #2
Don't use regular soil in a raised bed.
You MUST use a high quality potting mix to fill your raised bed. I've written a comprehensive article on Soil for Raised Beds which includes a recipe, recommendations for commercial mixes, and a quantity calculator. Regular garden soil will compact and harden, and will not provide the plant roots with enough air or water drainage. See if you can find a local supplier of bulk potting mix (not "topsoil"). This will usually be much cheaper than buying 30 or more bags of potting mix from Home Depot. Plus, you can either haul it in the back of a pickup or have them deliver it. Google "landscape supply" or "sand and gravel" your city". Now obviously you won't be using sand or gravel, but those places usually sell bulk potting mix as well.
How to Build Raised Beds: Guideline #3
Don't use preserved wood or other toxic materials when building your raised bed.
Use cedar, redwood or other naturally rot-resistant wood for your raised bed construction, but do not use anything "pressure treated" or with creosote in it. These substances are highly toxic (which is why the decay organisms cannot eat it) and will leach into your soil, and be taken up into your vegetables.
And if you decide to use cinder blocks or pavers, make sure you use concrete block made with ordinary aggregate. Many cinder block manufacturers use mining slag in their cinder block, which can contain metal oxides and sulfides, both of which can leach and toxify your soil.
How to Build Raised Beds: Guideline #4
Do not use a weed barrier under your raised bed.
Many "How to Build Raised Beds" sites tell you to lay weed barrier down before building your raised bed. This is a bad idea because:
- the roots of almost all plants go down much deeper than the depth of a raised bed to pull water and nutrients up
- it prevents organic matter from enriching the soil below
- it prevents earthworms from coming up, stopping the development of a healthy soil ecology in your garden
- Weeds like quackgrass grow right through weed cloth anyway
How to Build Raised Beds: Guideline #5
Gravel isn't necessary under a raised bed.
You will also see raised bed garden designs that tell you to lay gravel at the bottom of your bed "for drainage". Gravel is unnecessary if you have used good quality potting soil with perlite or vermiculite in it. The spaces between gravel particles will fill in with potting mix anyway, and it's just an unnecessary and useless expense.
There may be some advantage to laying gravel under just the portion of the bed where the wood rests on the ground because the bottom of the wood will not rot as quickly.
How to Build Raised Beds: Guideline #6
Prepare the soil under the raised bed. It's part of the garden.
Prepare the natural soil at the bottom of your bed before filling it with potting soil. Deep-rooted crops like carrots, beets and many other vegetables have feeder roots that in nature go down much deeper than the depth of your raised bed, sometimes down as much as 10 feet! Weed your plot well, level it, build the raised bed, and then loosen the soil in the bottom with a spading fork before filling it with potting mix. This will help your plants root more deeply, bringing up nutrients from nature's soil underneath.
How to Build Raised Beds: Guideline #7
If the soil inside a raised bed vegetable garden it is good soil that is beneficial to plant growth, it will be full of good bacteria and fungi. And the fungi will eat the wood.
Slowly but surely, they will do their job of breaking down cellulose (wood) into humic substances that are one of the important parts of healthy soil. While this process cannot be prevented (without toxic chemicals, which would leach into the soil and your food!), it can be slowed somewhat if you lay a line of gravel about 6" wide around the footprint of where your bed will go. This may allow for slightly faster drainage from the bed.
I'm mentioning this as a possibility, but it is a lot of extra work to dig a 4-6" trench around the base of where your bed will go, and then fill it with gravel. The soil mix will eventually make its way into the spaces between the gravel, and it would also need to be removed if you ever decided to expand and just garden in the ground.
For more, visit these related pages:
- Raised Bed Garden Designs: Photo Gallery
This is a photo gallery featuring nine different raised bed garden designs. The close-up photographs of the corner details should make it easy for those who are even a little handy to duplicate the construction. Make the dimensions fit your taste or space. - Soil for Raised Beds
Healthy soil is critical to producing healthful vegetables. Regular garden topsoil is too heavy for raised beds, and a lot of potting mixes carry undisclosed toxic ingredients. Find out how to fill your new raised bed vegetable garden with healthy soil, and calculate how much you will need. - Raised Bed Garden Kits
The fastest way to get up and growing is with a raised bed garden kit. Just open the box, assemble, fill with potting mix, and plant!. Available in many different designs, raised bed garden kits also come in different sizes and depths to fit your needs. This article is a side-by-side comparison of the best. - Raised Bed Corners
If you want to use local lumber but don’t have much in the way of tools, you can buy pre-made corners to join your lumber together. This is less expensive than buying kits, and allows you to make your raised bed garden any width or length. All you need is a screwdriver! - French Intensive Raised Bed Gardening
There is another type of raised bed, too: one with no frame at all! This is the way I have been gardening most of my life, and it is called double-dug, French intensive raised bed gardening. It costs nothing for building materials or imported potting soil, honors and supports natural soil ecology, and is sustainable indefinitely. You can watch a You Tube video showing how to use the method, if you would like to compare it with framed raised beds.
- Raised Strawberry Bed
Everyone loves raised beds, and everyone loves strawberries. A raised strawberry bed combines the best of both worlds.
Help share the skills and spread the joy
of organic, nutrient-dense vegetable gardening, and please...
~ Like us on Facebook ~
Thank you... and have fun in your garden!
Affiliate Disclaimer
This website contains affiliate links to a few quality products I can genuinely recommend. I am here to serve you, not to sell you, and I do not write reviews for income or recommend anything I would not use myself. If you make a purchase using an affiliate link here, I may earn a commission but this will not affect your price. My participation in these programs allows me to earn money that helps support this site. If you have comments, questions or concerns about the affiliate or advertising programs, please Contact Me.Contact Us Page
You Are Here: Vegetable Gardening Home > Raised Bed Vegetable Garden > Raised Bed Construction
Check out my FREE
ebook and newsletter!
Stay up-to-date with the best tips and techniques for vegetable gardening in harmony with nature's wisdom.
Click here to read more...
Employee-owned and
committed to pollinators:

I don't have any of those annoying scrolling ads on my site (you're welcome!). Instead I offer relevant links to a few companies and products that I can genuinely recommend. If you buy through these links I earn small commissions that help fund this site, but don't affect your price. Win/win! (And thank you...)