- Home
- Worm Composting
Worm Composting
Worm composting (aka "vermicomposting") is a fun and easy way to generate the most nutritious compost possible for your vegetable garden. It is generally so nutritious it might even be considered fertilizer! Not only is it a concentrated source of mineral nutrients, it also provides your soil a huge dose of beneficial microbes that are the very cornerstone of living, healthy soil.
A properly-managed worm bin speeds up the process of composting, converting most kitchen scraps into a usable form in a few weeks, rather than the few months it usually takes for traditional compost to be fully broken down.
What is left behind after the worms get done eating and excreting your kitchen scraps is called worm castings (marketable name for worm poop). It has no odor, is completely safe to handle, and resembles somewhat sticky, but very rich, garden soil.
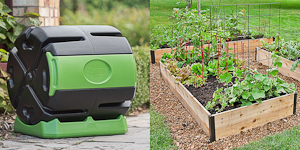
 This Dual Rubbermaid-Tub Worm Composting System Served Me Well for Several Years This Dual Rubbermaid-Tub Worm Composting System Served Me Well for Several Years |
 Feeding the Hungry Red Wigglers Feeding the Hungry Red Wigglers(They Would Demolish It Faster If I'd Chopped It Smaller...) |
The Amazing Benefits of Worm Castings
The reason worm castings are a much more concentrated nutrient source for plants than traditional compost is that the worms eat all the kitchen scraps, but mostly only use the carbon and nitrogen out of them, which leaves behind most of the minerals, now in concentrated form, that are then excreted.
This is not to say that worm castings can necessarily replace a complete organic fertilizer though, because - as they say in the programming world - "garbage in, garbage out". If the minerals weren't present in the food/kitchen scraps in the first place, they won't be in the worm castings either.
As most of us now realize, storebought food - even organic storebought food - is often woefully lacking in mineral nutrition because so many of our farm soils are seriously depleted. (But that's a different story.)
Nevertheless, a worm bin is an outstanding way to concentrate and re-use the minerals that ARE present!
Year-Round Worm Composting, Indoors!
The concentration of minerals and microbes makes worm composting a fabulous complement to vegetable
gardening. In fact, I think it's now a necessary component of a vibrant, healthy vegetable garden!
A properly balanced and healthy worm composting operation has no smell and can be easily kept in the garage, basement, or even kitchen. It does need a fairly stable temperature.
If you're like me, it's only a couple of weeks post-harvest in the fall before I start pining for my outdoor vegetable garden. So I up my worm game! I especially love my wormie friends in the wintertime, when my worm bin gives this lonely gardener
something to nurture (though of course, I now have my ducks, too...)
How to Make A DIY Worm Composting Bin
My original DIY worm bin was on our enclosed front porch, and was made of two stacking Rubbermaid tubs, a 10-gallon one on the bottom (without its lid), and a 14-gallon one nestled inside that, resting on bricks in the bottom of the smaller one (two ten-galloners would work just as well). I have since replaced my Rubbermaid setup with a Hungry Bin™, but I'll describe how I made my original DIY worm bin, It's a great way to get started and get the hang of worm composting before making a big investment.
Constructing the worm composting bin is a snap. I bought both tubs for about $18. at Home Depot. The bottom bin is as it came, without modifications.
The top bin has its lid, as-is without holes. I drilled a series of 3/8" holes around the upper sides of the upper bin for aeration, as well as a couple dozen 3/16" holes in the bottom of the upper bin for drainage.
The food, bedding, and worms go in the top bin, where the worms mostly stay, chomping on the fresh food. The bottom bin captures drainage (sometimes called "worm tea") and whatever worms fall or crawl through.
Putting some moistened bedding in the bottom bin helps any worms that fall through to survive until you can return them to the top bin. Check it as often as you can remember.
Setting Up Your Worm Composting Bin
Location, Location, Location
Don’t set your worm composting system near anything that vibrates, like a refrigerator, chest freezer or clothes dryer. Worms are disturbed by vibration and movement, and (just like me) they don’t like too much light or noise.
Also find a place that stays at a fairly even temperature. Worms need to stay between about 55 and 77 degrees - and if it gets over 84 degrees, they will die! If you decide to make a large outdoor worm bin, make sure it is insulated enough to stay within this temperature range year-round, and preferably in the shade.
Worm Bedding Material
This is the number one most important part of caring for your worms. Worm bedding should have the following qualities:
- Be able to retain moisture without compacting down into a soggy mess
- Be loose enough for air to penetrate
- Be neither too fine (packs down too much) or too coarse (too much air space)
- Not be too high in nitrogen (ie, protein) – no fresh manure or fresh grass clippings
- Have plenty of carbon, such as newspaper, paper bags, or fine wood chips
- Not be too acidic or too alkaline
- Be free of pesticide residues and other toxins
- have a bit of fine soil or eggshell to provide grit (worms don't have teeth so they need grit in their gizzard to grind up the food)
Great combinations can include straw, shredded newspaper (but not the shiny colored pages), the output of your office paper shredder, crumbled dried leaves, tiny wood chips or sawdust from woodworking machines, dried alfalfa or grass hay, strips of cardboard (easy to cut with a box knife), or shredded brown paper bags. Just make sure the materials you use comply with the rules above, and mix and moisten them thoroughly. Worms aren't going to crawl through a solid mass of sawdust!
And here's a fun fact: my Hungry Bin ate its own cardboard shipping box! I cut it up into smaller pieces with a box knife and put it in there a bit at a time with the food scraps. Yum yum!
Fill your worm composting bin about 1/2 full with the bedding mix. Add water a bit at a time while mixing, until the whole mix is about as wet as a wrung-out sponge. When it’s all mixed and evenly moist, sprinkle on a handful or two of the best garden soil you’ve got and toss the mix again. Then add kitchen scraps till the bin is about 3/4 full.
A mistake many beginning worm herders make is taking a big bucket of kitchen scraps and putting worms in it. There needs to be a balance between heavy, wet veggie scraps and drier bedding material like the newspaper, straw, coconut coir, fine wood chips or sliced up strips of cardboard like we talked about in the last paragraph.
Over time, I've found that too much water is more of a problem than not enough. The contents of the worm bin will get wetter and wetter each time you feed them, so keep adding some fresh dry bedding with your veggie scraps to keep the whole thing from getting too soggy. A bit farther on I'll tell you how to refresh your whole bin when it's getting "ripe".
Best Worms for Vermiculture
Your comfy new worm condo is now ready for tenants. There are many species available for worm composting, but red wigglers are the most popular because they’re the best performers in worm bins. They aren’t too fussy, they work and reproduce like crazy, and they love their job. Also, don't think you have to buy a lot, like a 1 or 2 lb. package. A handful will do, because if you get the balance right, they will reproduce like crazy in short order.
NOTE: NEVER use Asian jumping worms in your worm bin thinking they might be "fun". They are a terribly invasive species that are killing forests in the upper midwest. And realize that whenever you use worm castings on your garden, you are releasing the eggs of the worms in your bin, so do not think that they won't "escape" into the wild.
Also, don’t try to domesticate night crawlers -- despite the fact that they like to come out and party at night, they are deep-soil dwellers, and do not like living in a bin. As for outdoor garden worms... they may all look alike, but you’ll dig up a variety of species who may not like being employed by a worm composting master.
To find a supplier of red wigglers, I would suggest first doing a little local internet research to see if anyone in your area has earthworms to give away or sell. Try “worm composting your city”, look for local community garden organizations, or even check Next Door or Craigslist.
If you cannot find free red wigglers locally, the most reliable supplier I've found is Uncle Jim's Worm Farm. Starting out, a 100 to 500-worm package is plenty - unless your worm bin is an old bathtub and you're generating 5 gallons a week of kitchen scraps!
Healthy happy worms eat about half their weight in veggie scraps per day.
When I started, I just got a couple of pitchforks full of bedding, food, and worms from the worm composting operation at The Urban Farm teaching facility here in Denver, and I adjusted what I fed them based on how much they had left over at the end of the week. Lots of food left over at the end of the week: cut back. No food left: feed them a bit more.
By intentionally giving them a bit more than what they can eat in a week, or a bit less than what they need, you can “force” your population numbers up or down, within reason. Of course you also need to supply them space and bedding to match. But if their other needs are being provided, they will multiply or die off to match their supply of food.
Alternatively, rather than forcing your worm population to match your
scraps output, you can expand or contract the size of your worm
composting system. If you have a multiple-bin system, just add or remove the stacking bins or trays. (But I found that a big stack of Rubbermaid tubs got incredibly heavy and difficulty to manage!)
| DO Feed: | Do NOT Feed: |
| vegetable scraps (but no onions or garlic) | onions or garlic |
| fruit scraps and peels (but no citrus) | citrus fruit or rinds |
| small amounts of bread or tortillas | meat |
| whole beans or grains (not refried beans, too oily) | dairy |
| coffee grounds (they’ll love you for these!) | anything oily |
| old fall leaves | pet poop |
| small amounts well-aged manure | fresh manure |
| straw | fresh grass clippings |
When you are first starting out, check in on the worms every two or three days to make sure the water and food levels are okay. Be careful not to let them dry out or starve, or to overfeed them, which will cause rotting and odor.
If you eat non-organic produce, get in the habit of washing it well before you or your worms eat it. Worms are like the canary in the coal mine when it comes to pesticides. Even the residues can kill them. I have eaten organic food for 50 years now, and I'm so glad I have. If you don't think it's that big a deal there are a lot of good movies out now, like “The Vanishing of the Bees” on Netflix.
Harvesting Worm Castings and Worm Tea
(Note: This section doesn't apply to the Hungry Bin, which is designed as a flow-through system that just delivers finished worm castings out the bottom.)
Over time, the stuff you’re feeding your worms, as well as the bedding itself, will start to look less and less like veggie scraps, wood chips and newspaper and more and more like soggy worm poop... er... I mean finished worm castings. This is a good thing for you, but not such a good thing for the worms.
From your perspective, you see beautiful finished worm castings to enrich your garden, but from the worms perspective, they are now moving around in their own poop, which is becoming acidic and toxic to them. It’s time to harvest and renew the bin.
There are several ways to go about this, but for a small, single-bin operation, I do the following: I go too long between feedings, maybe two weeks, and then on feeding day I gently smush the entire contents of the worm bin over to one side of the tub. I mix up a particularly attractive new batch of bedding and food (half-rotted leaves or straw, coffee grounds, and a sliced-open rotten avocado - which seems to be their #1 favorite food of all time, some finely chopped starting-to-rot fruit), and put it in the now-empty side of the bin.
Within the next week most of the worms will have moved over to the new food source, and I can harvest the old side of the tub, picking out any worms I find and putting them in the new stuff. If you really have too many worms, expand your operation, or share with the neighbors so they can start their own worm farms.
Another way to harvest worm castings is to cut a piece of window screen or fine hardware cloth the size of the surface of your worm bin and lay it on the surface, then pile on a bunch of banana peels, mushy avos, sliced apples, cantaloupe rinds, or other nummy worm foods along with some moist brown paper strips. Over the next week or so most of the worms will be on top of the screen chomping on the food, and you can harvest the worm casting from down below, and then refresh the bin with new bedding.
A third way is to dump the whole bin over on a tarp on the ground in the sun. Stand there for a few minutes (don't go inside and forget them!), and the worms will all head ASAP down to the bottom of the pile. You can then scoop the castings off the top. This is messy because the fresh and the old are kind of mixed together, but it's relatively fast and effective.
Troubleshooting Your DIY Worm Composting Bin
Check the bottom bin frequently, rescue any still-alive
unfortunates that crawled or fell through the holes, and use the liquid drainings directly on the garden, with a
little more water added if needed. If you had some bedding in there, you can dump the liquid and bedding in your outdoor compost pile, provided its not in its hot phase.
At first I lined the bottom of the upper tub with an old piece of shade cloth so the worms wouldn't fall through the 1/8" holes, but they crawled right through the tiny mesh of the cloth.
Remember, not all worms
are adults - the hatchlings are only about 1/8" long and the diameter of a hair, so don't think that they aren't going to go through holes - a few
will. But mostly they only try to escape if their
bin has become too wet, too acidic, or too low on food. Check the bin a
couple of times a week to assess moisture level (about as moist as a
wrung-out sponge), food availability (there should be visible scraps with worms
feasting on it), and bedding status (paper, coir, straw, leaves, etc. to
moderate acidity and moisture).
My Rubbermaid worm composting system worked pretty well, but was kind of time-consuming at harvest time because I spent a lot of time trying to pick all the living worms from the castings.
Some Final Thoughts
Worm composting is an interactive, collaborative venture between you and the noble earthworm. It doesn’t take a lot time or effort, but it does take ongoing awareness and willingness to check in with the worms every week or so, see how their work is going, and attend to their needs, be that fresh bedding, food, or cleaning/harvesting.
I know it sounds kind of weird, but my worm box has almost become like a pet. Not that I cuddle with earthworms, but I have so much appreciation for the vital part they play in life on planet Earth that I approach my worm bin with great love and gratitude for the amazing thing they do in there, as well as all over the rest of the Earth. We couldn’t live without ‘em. I love to lift the lid on the worm bin sometimes and just listen to the little "wet" noises they make while eating food. That little noise is happening all over the world, underground!
Gardening magazines are always packed with glamorous photos of buxom tomatoes, the hottest flower varieties, and gleaming teak garden furniture. Worm composting doesn’t get much cover press, but worms are the part of foundation upon which that bountiful harvest, indeed life on Planet Earth, rests.
Long live the Earthworm People!
Help share the skills and spread the joy
of organic, nutrient-dense vegetable gardening, and please...
~ Like us on Facebook ~
Thank you... and have fun in your garden!
Affiliate Disclaimer
This website contains affiliate links to a few quality products I can genuinely recommend. I am here to serve you, not to sell you, and I do not write reviews for income or recommend anything I would not use myself. If you make a purchase using an affiliate link here, I may earn a commission but this will not affect your price. My participation in these programs allows me to earn money that helps support this site. If you have comments, questions or concerns about the affiliate or advertising programs, please Contact Me.Contact Us Page
You Are Here: Vegetable Gardening Home > Worm Composting
Check out my FREE
ebook and newsletter!
Stay up-to-date with the best tips and techniques for vegetable gardening in harmony with nature's wisdom.
Click here to read more...
Employee-owned and
committed to pollinators:

I don't have any of those annoying scrolling ads on my site (you're welcome!). Instead I offer relevant links to a few companies and products that I can genuinely recommend. If you buy through these links I earn small commissions that help fund this site, but don't affect your price. Win/win! (And thank you...)