- Home
- How to Start Seeds Indoors
How to Start Seeds Indoors

Learning how to start seeds indoors will open up the gardening season early for you, but that's not the only benefit. Here are some of the other advantages (besides not going winter stir-crazy!):
- you have a much bigger choice of varieties from seeds (that may match your climate or palate better) than transplants from a national chain
- you'll be slurping that first juicy tomato sooner
- it is generally cheaper than buying transplants
- your crops will be heads above the weeds, making it harder to inadvertently weed out your direct-seeded crops
- you won't have to go back and thin your row-planted seeds later
- if you have a really short growing season, you'll be able to grow things that wouldn't normally mature in your short season
When I first learned how to start seeds indoors I went a bit crazy and started way more plants of way more varieties than I had room for in my garden. But my neighbors and friends didn't complain when I gave them the extras, and I had an awful lot of fun in my indoor nursery while it was still snowing outside.
But I have learned to restrain myself a little now and not start quite so many things, and more importantly, not to start so early that I end up with spindly, root-bound plants already trying to go to seed.
I learned the hard way that root-bound plants, already trying to set tomatoes while still in their little pots, are doing so because they think they're going to die. They know that their roots have nowhere to go, and a plant that thinks it can't grow any more will put all its energy into making flowers and setting seeds so it can reproduce itself before it dies. A plant like this is not interested in growing roots anymore, it just wants to make seeds. Even if you transplant it out and tear off the circling roots it will never get
as big as the volunteers that come up on their own after the soil has
warmed, and whose roots never got disturbed.
So the perfect timing for transplanting out is just as the seedling's roots are starting to reach the edge of the pot.
All of which is to say that timing is critical.
To keep this from being a very, very long page, I have written a separate article that details how to determine when to start seeds indoors at the perfect time for your climate, for each vegetable you want to grow.
It all revolves around the last day of the winter/spring season that you are likely to get a hard frost.

Starting Seeds Indoors:
Pots and Potting Mix
|
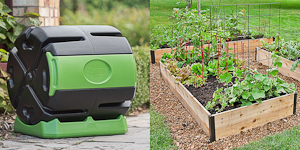
There are many different seed-starting setups on the market. As with tools (and for me, knives and stockpots!), I look for quality and durability. I've learned over the years that paying for durability ends up being much cheaper in the long run - though I haven't always been able to afford quality up front. When I was really short on cash I used to get free 2" and 4” square plastic pots in
flats from the trash bin behind my local nursery (I always asked first). If you can source used ones, wash them
well in hot soapy water or sanitize them in a mild bleach solution (1
part bleach, 10 parts water) before using to prevent plant diseases. |
Regular A seed has everything it needs inside to grow until it gets its first true leaves. Pretty much any reasonably balanced storebought potting mix will work fine, or use: 1 part presoaked coir |
You'll also need the 10"x 20" flat trays that the pots go in. Another free option is to use discarded styrofoam coffee cups with holes poked in the bottom (but please don't go buy or use new ones for this - they're terrible for the environment!)
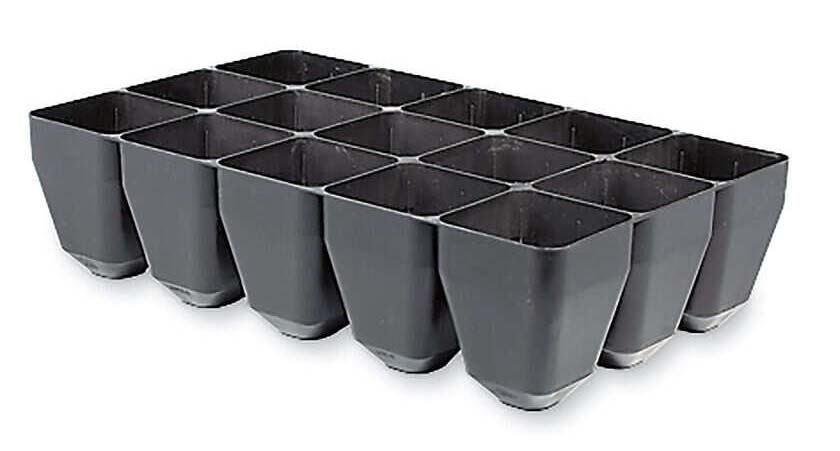
My favorite seed starting trays, the best trays I have ever used for starting seeds indoors, are the Deep Root Seed Starting Trays from Gardener's Supply. They are built to last forever (mine are 10 years old in 2021) and you can get them with an optional self-watering mat and grow dome. If you're apt to forget to water, the mat is awesome, but if you're mindful you won't really need either the mat or the dome.
I use a variety of sizes, because some plants, like onions (from seed), do well in the 40-cells-per-tray size, while some plants need more room, like collards and chard, which I start in the 28's and later transplant up into the 15's as they get bigger. The outside dimensions of all these trays are the same, but the 40's have the smallest cells and the 15's have the largest.
The trays do need some kind of drip tray underneath to catch drips. I use large boot trays from Home Depot, which hold 3 deep root trays side-by-side. These are also useful for bottom-watering: if I'm going away for a day or two I just put 1/4" of water in the bottom of the boot tray and the water wicks up as needed into the potting mix.
COVID-19 NOTE: Since the start of the pandemic, Gardener's Supply has only carried the 15-cell size tray. It's still unknown whether or if the smaller-celled trays will return...
Since the space on my
shelves (and heat mats) is usually at a premium, I like to optimize the number of plants I
can fit there by using the smallest cell size possible, at least until
it's time to transplant up if they start getting rootbound.
I do NOT recommend using any of the cheap, flimsy plastic systems for starting seeds indoors. Besides the added expense of replacing them when they break, (which they always do - planned obsolescence never goes out of style when you're selling something), they aren't recyclable. And we're gardeners of the Earth after all.
I also don't recommend "compostable" or "plantable" peat or cardboard pots, but for a different reason. Even though they may be more eco-friendly (though peat is a non-renewable resource), they are v e r y slow to break down in the soil, and in the meantime they impede the seedling's roots from freely spreading out in all directions, which decreases overall plant size and eventual yield.
In 2011 I did a side-by-side comparison. My yield of peat-pot grown peppers was 30-40% less than that of the free-root transplants grown in my deep root seed starting trays.
And now... (drumroll please)... I've saved the best for last:
Soil Blocks
 Seeds Started Indoors Using Soil Blocks
Soil blocks are a fairly recent addition to my seed-starting toolbox, but they have quickly convinced me that they are the absolute best method of starting seeds indoors.
You make soil blocks using a tool called (gee, what a clever name...) a soil block maker, as well as a special, sticky-recipe potting soil mix.
A soil block maker is a very cool metal form that has four, five, or even twenty cube-shaped cells. This system is sustainable, plastic-free, better for building healthy root systems, and is now used on many organic farms.
The only downside to soil blocks is that they are more time- and labor-intensive up-front, so you have to give yourself enough time early in the season to make a bunch of soil blocks.
(But then again, is it a downside if it gives me something to do in January when it's still too early to do anything else in the garden?)
How to start seeds indoors using soil blocks has its very own page. Read more about making and using soil blocks here.
Starting Seeds Indoors:
Shelves and Lights
Light Requirements
Seedlings need very bright light to keep from growing spindly and weak. Contrary to popular belief, a windowsill is not a
good place for starting seeds indoors because the seedlings will grow
sideways and spindly trying to reach the light, even if you turn the
tray around every day. Also, the cold air coming off a window at night
will slow germination and growth.
Start seedlings under bright fluorescent lights. Seedlings do not need full-spectrum light, only the red and blue frequencies which are provided by cool white fluorescents. Cheap shop lights work great! (Now if you wanted to get plants to flower, you'd be better off with a different bulb with a broader spectrum of light.)
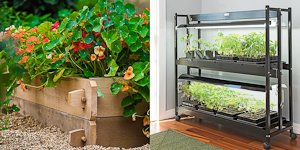
Shelving
As a veteran DIYer, I've used a variety of different plant shelves over the years - mostly home-built ones made out 2x4's for uprights and 1x2's for cross-slat shelves.
But a
few years ago I discovered that the ideal, adaptable, moveable
replacement is the ubiquitous wire shelf unit sold by Costco and many
sellers on Amazon. These are relatively low-cost and I now have a bank
of them in my basement, where I grow lettuce and microgreens all winter,
and all my own vegetable and flower seedlings in late winter and early
spring. (And one shelf does double-duty as a drying rack for my wool
socks.)
I attach S-hooks under each
shelf and suspend the shop lights from little chains, which
then shine on the seed flat on the shelf below. I can raise and lower
the height of the lights by hooking the chain higher or lower on the
S-hook. (There are no lights above the very top shelf, but then again there are no
plants on it either - it's too high to reach for
watering. I store my extra heat mats and deep root trays up there. Plus naughty-cat Jackson sleeps up there on trash day, when the Scary Truck comes to terrorize the neighborhood.)
If you want to purchase a top-notch, living-room-worthy, ready-made seed starting shelf unit with lights, I highly recommend the various sizes of SunLite Garden by Gardener's Supply. They are
beautiful, the lights are much quicker and easier to adjust than chains on S hooks, and they come in a bunch
of different sizes and designs to fit every need and taste.
Give your seedlings 12-16 hours of light per day, but no more than this – they need a dark cycle, too. The lights should be adjusted so that they stay within 1-3” of the top of the seedlings. Raise the lights as the plants grow, and put the lights on an outlet timer (from a Home Depot-ish kinda place) so you don’t forget to turn them on or off at the right time.
Starting Seeds Indoors:
Warmth
One of the biggest challenges I used to have starting seeds indoors was finding a place that was warm enough, because most seeds need temperatures between 65˚and 80˚ F to germinate.
If you have a furnace room or other warm place, set up your seed-starting shelves nearby.
Since I don't have that, I use seedling heat mats, which keep my seeds and seedlings warm and greatly speed germination and growth, encouraging strong healthy plants. This is especially helpful for really slow-growing seedlings like peppers and parsley. Don't use a heating pad - even on low they get too hot for seedlings and are not built for wet environments. If you don't have a warm place or a heat mat, just start your seedlings a few weeks earlier.
Starting Seeds Indoors:
Planting the Seeds
The back of your seed packet will tell you how deep to plant each variety of seed that you have. A rule of thumb is to plant them about 3 times the diameter of the seed, but I have found it is generally better to plant seeds a bit shallower than recommended when starting them indoors..
Plant at least two seeds in each hole as insurance against poor germination. If both seeds sprout and grow, snip off the smaller one to let the other grow strong without competition. Snip instead of pulling it out, so you don't damage the root of the one you're keeping.
Beginning gardeners sometimes have a hard time killing these beautiful little seedlings, but your garden will be much stronger if you do this. I always say a silent "thank you" to the one I’m culling, and either eat it or add its little stem to the compost, out of respect. Nature is brilliant in this: it's why it oversupplies itself with masses of seeds per flower in the wild. To us it may appear cruel, but it is the cycle of abundant life and keeps the species adapted to conditions.
Starting Seeds Indoors:
Hardening Off and Transplanting
Our pampered little indoor seedlings need time to adjust to the great outdoors. They have to adapt to strong sunlight and wind, both of which stress plants and thereby make them strong.
About a week before you transplant your seedlings out, set the seed flats outside during the warm part of the day. in the shade at first, for a an hour or so. Every day for the next week increase their time outside and their exposure to sun. They will gradually adjust their “sunlight antennas” and strengthen their stems until they can take a full day of sun and wind without burning up or blowing over. This is known as "hardening off".
It is very easy to want to skip this step and think "but it's so nice outside!" I sometimes get impatient at this point, but one of the challenges of starting seeds indoors is being patient and giving them the time they need to adapt.
 Hardening Off Seedlings That
Were Started Indoors
When they are hardened off, transplant them out at the recommended spacing on the seed packet. Sometimes this is listed as "thin to x inches apart". I always grow a few extra in case I need to replace any that don’t make it. Sometimes they get eaten by birds or slugs, or otherwise mysteriously disappear overnight.
Help share the skills and spread the joy
of organic, nutrient-dense vegetable gardening, and please...
~ Like us on Facebook ~
Thank you... and have fun in your garden!
Affiliate Disclaimer
This website contains affiliate links to a few quality products I can genuinely recommend. I am here to serve you, not to sell you, and I do not write reviews for income or recommend anything I would not use myself. If you make a purchase using an affiliate link here, I may earn a commission but this will not affect your price. My participation in these programs allows me to earn money that helps support this site. If you have comments, questions or concerns about the affiliate or advertising programs, please Contact Me.Contact Us Page
You Are Here: Vegetable Gardening Home > Starting Seeds Indoors
Check out my FREE
ebook and newsletter!
Stay up-to-date with the best tips and techniques for vegetable gardening in harmony with nature's wisdom.
Click here to read more...
Employee-owned and
committed to pollinators:

I don't have any of those annoying scrolling ads on my site (you're welcome!). Instead I offer relevant links to a few companies and products that I can genuinely recommend. If you buy through these links I earn small commissions that help fund this site, but don't affect your price. Win/win! (And thank you...)
BTW: Everything I recommend on this site is something I genuinely
love. I don't get paid for reviews, though I will make a small commission if you buy stuff through the links of this page. Any money earned helps support this site, and my commissions do not affect your price.
Heat Mats
I save a ton of money by starting my own seeds in late winter. My heat mats are a necessity and especially helpful for tomatoes and peppers!

The most sustainable, practical and root-friendly way to start seeds indoors, bar none.

More compact version of the 3-tier, but still with adjustable heights.
