- Home
- ...TOMATOES!
- Upside Down Tomatoes
Growing Upside Down Tomatoes
Growing upside down tomatoes is a great way to save space, have some fun, and start an interesting conversation at your next barbecue.
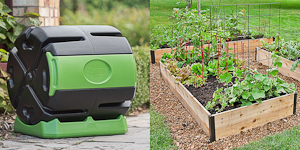
Last year I did a side-by side comparison of four different upside down tomato planters: a Topsy Turvy Tomato Planter™, a Gardener’s Supply Revolution Planter™, an ordinary hanging basket, and a four-gallon plastic bucket with a metal bail, to see which one I liked best. You can follow the challenge in all its exciting detail in The Great Upside-Down Tomato Race.
Truthfully, all of them worked quite well. After the poor tomatoes realized that it was hopeless to try to right themselves, they actually seemed to like being grown that way, giving even slightly better yields than the ones I grew in my in-the-ground garden. (Though I have to admit that the year I did this I had some problems in my in-the-ground tomato patch. Someone had dumped ashes from the wood stove directly on the garden, making too alkaline.)
Upside down tomatoes need little care other than consistent watering, and I love having them right outside my back door at dinnertime.
How to Plant and Maintain Upside Down Tomatoes
Here are some universal instructions, no matter which type upside down tomato planter you use. Read through them all before you begin:
Hang the planter in its final location before you plant it. These puppies are really heavy when they’re full, and you can’t just set them down or you’ll squash the baby plant.
I’ve found the easiest way to plant them is to hang the planter low temporarily while you plant and fill it. To do this, tie a loop of nylon cord from the final-destination hook so that the planter is hanging at a comfortable working height. You may need an S shaped hook from the hardware store to do this if your planter doesn’t have a hook on the top.
Plant the tomato by carefully inserting the tomato root ball into the bottom of the planter. Put the foam rubber soil retainer in place around its stem, and then begin filling the planter with soil a bit at a time. Work carefully with both hands, one holding the tomato from below and one patting the soil in around it from above. After you are done filling it with soil, have a friend help you hoist it up the rest of the way and hang it directly from the hook. Water thoroughly after it is in its final destination.
Hang the planter from something very stable and able to support the weight, not only of the planter now, but its full weight plus the weight of a big plant loaded with tomatoes later in the summer. Make sure to choose a full-sun location, like the south-facing eaves of your house, balcony, or arbor. Tomatoes need full sun all day to produce well. If you’re really excited about growing upside down tomatoes, you might want to build a free-standing “tomato tower” like this one that I built, which holds four planters. (I will post a photo here soon.)
If the roots won’t fit through the hole at the bottom of the planter, try this trick: pull the pot off the roots, immerse the rootball with its soil in a bucket of water and gently rinse off the potting soil. Gently push the bare rootball through the hole, put the little foam rubber soil retainer around the stem to prevent the potting soil from falling out, and start filling in around the roots. Be extremely gentle when you do this and make sure the roots are well covered with soil as you fill the bucket with potting mix (an extra pair of hands are a help). As it says above, work carefully with both hands, one holding the tomato from below and one patting the soil in around it from above.
Use a water-retaining hydrogel in your potting mix. These are tiny crystals which swell to the size of peanuts when wet and look like clear jello. Miracle Gro now makes one available at Home Depot under the name Water Storing Crystals. They act as a buffer against soil being too wet or too dry, which allows you to get away on the weekends. You have to mix it up in a bucket at least 15 minutes ahead of time – if you just mix it in dry, it will swell so much it will push the potting soil up and out of the planter. Some potting mixes, such as Miracle-Gro Moisture Control™, have hydrogel already mixed in.
Mix in some good quality compost. Homemade compost is by far and away the best because of the variety of raw ingredients that go into it. This variety provides not only good soil structure and water retention, but significant plant nutrition. Store bought compost is usually made of just one or two waste products, such as decomposed cow poop and tiny wood chips, which will not provide broad spectrum plant nutrition.
Fertilize. If you want organic tomatoes, you must use good compost as well as organic fertilizers like rock phosphate, bone meal, greensand and/or bloodmeal or alfalfa pellets. If you aren’t concerned about growing organically, use a good quality, time-release, all-around vegetable fertilizer like Osmocote™ or Miracle Grow™, or use Miracle-Gro Potting Mix that has time release fertilizer pre-mixed in.
Help share the skills and spread the joy
of organic, nutrient-dense vegetable gardening, and please...
~ Like us on Facebook ~
Thank you... and have fun in your garden!
Affiliate Disclaimer
This website contains affiliate links to a few quality products I can genuinely recommend. I am here to serve you, not to sell you, and I do not write reviews for income or recommend anything I would not use myself. If you make a purchase using an affiliate link here, I may earn a commission but this will not affect your price. My participation in these programs allows me to earn money that helps support this site. If you have comments, questions or concerns about the affiliate or advertising programs, please Contact Me.Contact Us Page
Check out my FREE
ebook and newsletter!
Stay up-to-date with the best tips and techniques for vegetable gardening in harmony with nature's wisdom.
Click here to read more...
Employee-owned and
committed to pollinators:

I don't have any of those annoying scrolling ads on my site (you're welcome!). Instead I offer relevant links to a few companies and products that I can genuinely recommend. If you buy through these links I earn small commissions that help fund this site, but don't affect your price. Win/win! (And thank you...)