- Home
- Container Vegetable Gardening
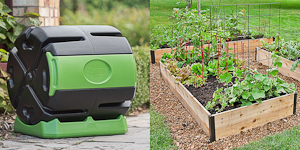
- Self-watering Containers
Why I Love Self-Watering Containers
What’s the difference between self-watering containers, and just big pots with no drain holes in the bottom? There’s a huge difference, and it’s why I love my self-watering pots.
How a Self-Watering Container Works
When a big drainless pot gets given more water than the plant can use right away, the water settles in the bottom and the potting mix begins to rot, eventually becoming a stinky, waterlogged mess that will kill plant roots.
But in a self-watering planter, the potting mix is held above the water by a screen or false bottom. The water chamber and the soil above are connected by small porous channel filled with soil, which then acts as a wick.
As water is used by the plant or evaporates off the surface of the soil, capillary action draws more water up from below, exactly as much as is used, and no more. The soil has just the right amount of water all the time, but also maintains air pockets, which the plant roots also need.
Self-watering planters are filled through a wide tube that reaches from the water chamber in the bottom up to the surface. To water, you put the hose or watering can end into this tube, and water until the water chamber has reached capacity. You’ll know it’s full when water starts to run out of the overflow hole on the side. This hole makes overfilling impossible. Use a big saucer underneath if you’re using them indoors.
Self-watering containers can go for many days, even in the heat of summer, without needing to be watered. And because of the chamber and wick, can never become waterlogged.
The reason I love my self-watering pots is that they save me hours of watering time every week.
You Must Fertilize Differently Than Other Containers
The biggest problem with any self-watering container is the potential for concentration of minerals salts in the potting mix, which can occur because water is repeatedly drawn up from below and evaporated off the top, leaving dissolved minerals behind. Over time these mineral salts can build up and become toxic to the plants.
All water contains some naturally-occurring minerals (except distilled water). If you have a water softener or are on well water, the problem can be worse because both these water sources have very high dissolved mineral content.
But the most common cause of plant failure due to high dissolved mineral salts is… added water soluble fertilizers.
Most of us have become used to the convenience of a little blue Miracle Gro in our watering cans, which works wonderfully on containers that drain out the bottom and occasionally get flushed through. But using water soluble fertilizers in self-watering containers will lead to salt buildup because of the repeated wicking and evaporation. (You'll read on some manufacturer's websites that it's okay, but it WILL build up over time.)
How to Prevent Salt Buildup
- Use the fertilizer strip that comes with your container, as directed.
Alternately, use dry, granular fertilizer mixed into the soil mix at the time of planting, but do not use liquid or time-release fertilizers in self-watering pots, and do not fertilize from either above or below after planting. As the water wicks up, the fertilizer will become available.
Vegetables, flowers, and herbs all have slightly different nutrient requirements, so choose a dry granular fertilizer recommended for use on the type of plants you are growing, and use it according to the package directions. Never put fertilizer in the water chamber at the bottom. - Mix lots of compost in with the potting mix.
Compost helps hold positive ion nutrients in the soil and makes them available to the plants as needed. Homemade compost is much better than store bought because it is usually made from a variety of ingredients (not just cow poop and wood chips), which means it has more broad-spectrum, natural nutrition in it for the plants. It also contains billions of beneficial microorganisms that help plants absorb nutrients. You can use less fertilizer in a compost-rich mix. - Completely soak your planter by hand one time in the mid-summer.
Water from above with plain water until the whole thing is soaking wet, the chamber in the bottom is full, and the water is overflowing out the side hole. Let the water run through the potting mix for a few minutes to dissolve and flush out any mineral buildup in the soil.
But you’re not done yet… Now you have to tip the planter on its side and drain out as much of the water from the bottom chamber as possible, otherwise the minerals you just flushed out will wick right back up into the soil again as the plant drinks.
4. Replace the potting mix every year.
Or if you really want to use the same mix again, flush it out thoroughly with water at the end of the season, and then renew it by adding a bunch of fresh compost.
Other Care Tips
Never let the water chamber run completely dry. Once the chamber runs dry, the soil will quickly dry out, and once the soil itself is dry, it will no longer wick water!
Think about a completely dried-up dishsponge. If you try to wipe up a spill with a completely dry sponge, it doesn't work very well. It needs to be a little wet in order for capillary action to work.
For this same reason, when you first fill your planter with potting mix, water it lightly from above just to moisten the soil. From there on out the water will wick up automatically from below.
Do not leave self-watering pots out after hard frost. The water chamber in the bottom will freeze and expand, and it can break the pot. If you want to store them outside for the winter, drain the bottom completely dry, and preferably, empty and invert them until spring, as you would with terra cotta.
Though many are photographed with flowers, all of them will work as well with vegetables. Pick the ones that fit your space, the size of vegetables and herbs you want to grow, and your sense of aesthetic. Have fun!
Help share the skills and spread the joy
of organic, nutrient-dense vegetable gardening, and please...
~ Like us on Facebook ~
Thank you... and have fun in your garden!
Affiliate Disclaimer
This website contains affiliate links to a few quality products I can genuinely recommend. I am here to serve you, not to sell you, and I do not write reviews for income or recommend anything I would not use myself. If you make a purchase using an affiliate link here, I may earn a commission but this will not affect your price. My participation in these programs allows me to earn money that helps support this site. If you have comments, questions or concerns about the affiliate or advertising programs, please Contact Me.Contact Us Page
You Are Here: Vegetable Gardening Home > Container Vegetable Gardening > Self-Watering Containers
Check out my FREE
ebook and newsletter!
Stay up-to-date with the best tips and techniques for vegetable gardening in harmony with nature's wisdom.
Click here to read more...
Employee-owned and
committed to pollinators:

I don't have any of those annoying scrolling ads on my site (you're welcome!). Instead I offer relevant links to a few companies and products that I can genuinely recommend. If you buy through these links I earn small commissions that help fund this site, but don't affect your price. Win/win! (And thank you...)